Honkai: Star Rail Penacony Grand Theater Dream Ticker Puzzles Complete Guide (2026)
Hey guys, it's your guide back again! With the Penacony story reaching its epic conclusion, the Grand Theater has become the absolute must-visit spot for every Trailblazer in 2026. Seriously, this place is massive and just dripping with that majestic theater vibe – it's easily one of the most stunning locations HoYoverse has ever created. Beyond the jaw-dropping scenery, it's packed with goodies: treasures to find, the finale of Hanu's Adventures, quests galore, and of course, our adorable Origami Bird friends to collect. But let's be real, the real brain-burners here are the Dream Ticker puzzles. These aren't your average, run-of-the-mill clockie guides. Oh no. We're talking complex layouts, a ton of movable parts, and some seriously tricky mirror mechanics. They might make you scratch your head for a bit, but trust me, the rewards are totally worth the mental workout! I've spent hours figuring these out, so let me walk you through every single one.
🎭 Pinpointing All Four Dream Ticker Locations
First things first, you gotta find 'em all! The Grand Theater area hides four of these puzzles. Three are pretty easy to spot if you're just running around the main map, but one sneaky little guy is hiding somewhere special. Here's your treasure map:
-
Lonely Ticker: Head to the first room on your left, north of the Ascension Hallway Space Anchor. Can't miss it.
-
Bomb Ticker: Check the small room near the Space Anchor on the right side of the map. It's tucked away behind Aymille.
-
Awake Ticker: This one's chilling in the most north-eastern section of the map. Look for the corridor near the Echo of War entrance.
-
Starchaser Ticker: Ah, the sneaky one! This puzzle isn't in the "real" world. You have to go inside the Dreamscape – that's the setting for Act III of the Trailblazer's story within the theater itself. Once you're in the Dreamscape, find the middle Space Anchor and look on its right side.
Got all the locations marked? Awesome. Now, let's crack these puzzles open, one by one.
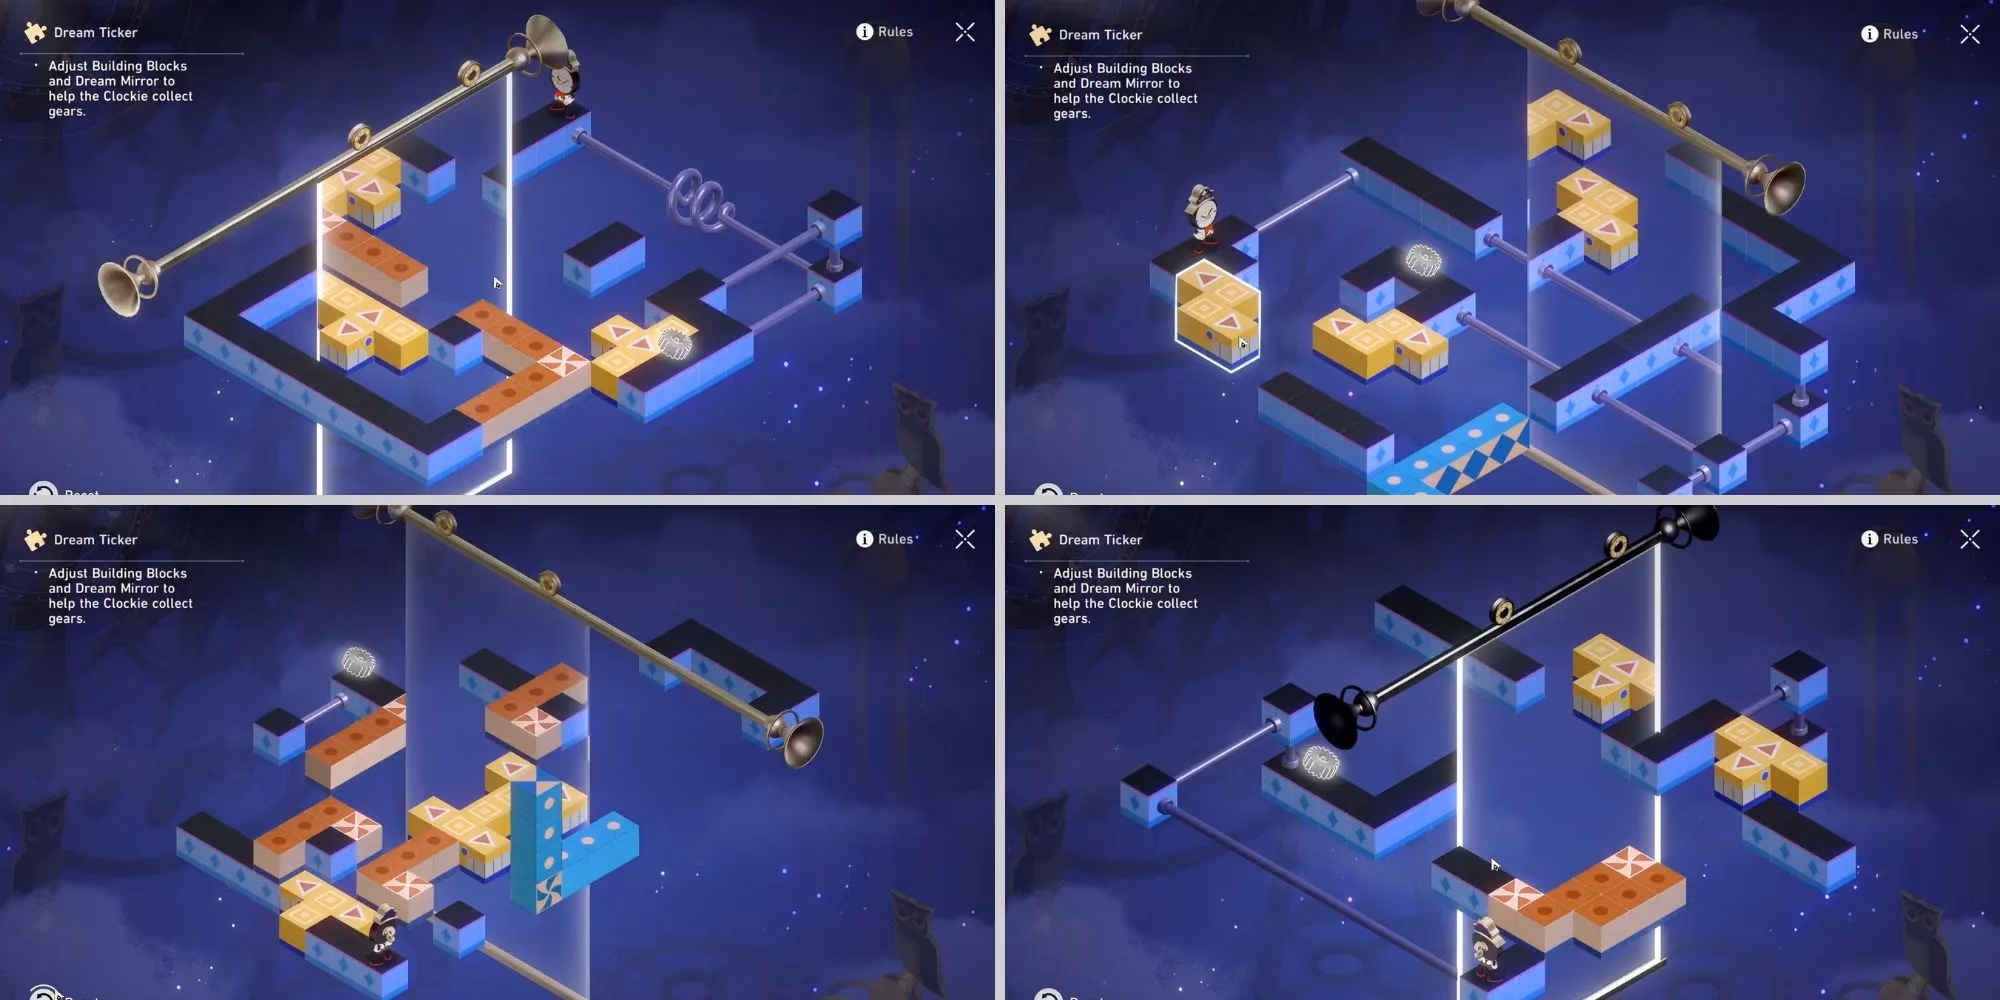
🧩 Puzzle #1: Lonely Ticker Walkthrough
This is your first taste of the Grand Theater's puzzle complexity. We're dealing with mirrors and platforms here. Let's break it down gear by gear.
For the Silver Gear:
-
Mirror First: Grab that mirror and slide it all the way to the left. This sets up our reflection path.
-
Platform Alignment: See the yellow platform at the bottom? Move it slightly upwards until it lines up perfectly with the road (and the orange platform) that runs parallel to the silver gear. Pro Tip: Don't touch the orange platform yet! We're just prepping the stage.
-
Vertical Connection: Now, find the other yellow platform (the vertical one). Move it slightly up as well to connect it to the road you just aligned. Boom, path to the first silver gear is complete!
For the Gold Gear:
-
Mirror Flip: Time to reposition! Move the mirror all the way to the right now.
-
Orange Platform Rotation: Find the orange platform. You'll need to rotate it twice to get it into the correct orientation.
-
Horizontal Yellow Platform: Take the horizontal yellow platform at the very bottom and move it up until it aligns with the platform where the gold gear is sitting.
-
Final Vertical Touch: Lastly, move the other yellow (vertical) platform one cube higher. The goal here is to make it touch the mirrored image of the other yellow platform, creating a bridge through the reflection. It's a classic mirror puzzle trick!
🧩 Puzzle #2: Bomb Ticker Solution Guide
Alright, moving on to the Bomb Ticker. This one has multiple silver gears, so stay organized!
First Silver Gear:
- This one's usually straightforward once you clear the initial path. Focus on setting up for the later ones.
Second Silver Gear:
-
Take the same yellow platform you used for the first gear and move it down to align with the platform shown in the image guide.
-
Now, grab the other yellow platform right beside it. Move it down as well. You need it to align with the platform holding the second silver gear, while still staying connected to the first yellow platform. It's like building a little platform staircase.
Third Silver Gear (The Tricky One):
-
Mirror to the End: Push the mirror all the way to the end of its track.
-
Lower the Platforms: Move both yellow platforms all the way to the bottom. We're creating space.
-
Blue Platform Rotation: Here's the key! Rotate the blue platform exactly as shown in the reference picture. This rotation is crucial for creating the final connection path through the mirror world.
Gold Gear:
-
Mirror to the Top: Reposition the mirror by moving it all the way to the top.
-
Platform Ballet: Now, maneuver both yellow platforms up and to the left (as shown in the guides). The trick is to keep them connected to each other and simultaneously connect them to the static roads. It might take a couple of tries to get the positioning just right!
🧩 Puzzle #3: Awake Ticker Step-by-Step
This one looks chaotic with multiple orange platforms, but we'll tame it.
First Silver Gear:
-
Move the yellow platform on the left upwards.
-
Find the orange platform near Clockie's starting point. Rotate it twice so it aligns with the platform he's standing on.
-
Move the other yellow platform to the right. This is just to make space for the next move.
-
Rotate the other orange platform (the one in the middle) twice.
-
Rotate the upper orange platform twice so its long end is on the opposite side.
-
Rotate the blue platform to align it, creating a connection with the first orange platform you adjusted.
-
Finally, move the mirror to the middle and align it so the top side creates a clear path straight to the silver gear.
Second Silver Gear:
-
Take the yellow platform on the left and move it downwards. You want its mirrored image to connect directly to where the second gear is located.
-
Rotate the orange platform near this yellow platform twice to finalize the bridge.
Third Silver Gear:
-
Rotate the blue platform three times. This is a specific orientation needed here.
-
Move the mirror all the way to the right.
-
Rotate the orange platform where the silver gear is sitting twice to complete the link.
Gold Gear:
-
Rotate the orange platform in the middle once. This simple move creates the necessary gap.
-
Move the yellow platform on the left side all the way up until it connects with the road leading to the gold gear. Simple and effective!
🧩 Puzzle #4: Starchaser Ticker (Dreamscape Hidden Puzzle)
Last but not least, the hidden Starchaser Ticker in the Dreamscape! Don't forget to find this place first.
For the Silver Gear:
-
Slide the mirror all the way to the left.
-
Find the orange platform that's further from Clockie. Rotate it twice. This clears the way.
-
Now, rotate the orange platform near Clockie just once. This should snap the path into place.
For the Gold Gear:
-
Move the yellow platform down to align it with the platforms holding the gold gear.
-
Rotate the orange platform at the bottom once. This creates a connecting road between all the movable pieces.
-
The final touch: adjust the mirror so that the yellow platform's mirrored image aligns perfectly with the platform under the gold gear. This mirror-link is the key to victory!
And there you have it, Trailblazers! All four Dream Ticker puzzles in the Penacony Grand Theater, solved. 🎉 These puzzles really test your spatial and mirror logic, but cracking them feels incredibly satisfying. The loot you get is just the cherry on top. Remember, if you get stuck, just take a deep breath and re-check your platform connections and mirror angles—that's usually where the snag is. Good luck, have fun exploring the rest of the gorgeous theater, and I'll catch you in the next guide! What was the hardest puzzle for you guys? Let me know in the comments below! 👇
Data referenced from The Verge - Gaming helps contextualize why puzzle-heavy set pieces like Penacony’s Grand Theater Dream Tickers resonate: modern live-service RPGs increasingly lean on cinematic staging and spatial mechanics (mirrors, rotating platforms, multi-step routes) to keep exploration engaging between major story beats, making optional brain-teasers feel like meaningful “content” rather than filler.